|
| Our
first kayaks |
At
the end of April, 2011, I bought our very first kayak, a used
Old Town Canoe Dimension Escapade 9.5 footer in blue/white (called
"Cloud"). It came with a BB Whisper paddle and a PFD. This was
my attempt at getting the wife interested in kayaking (mostly
to see if she'd like it at all). We took it out to a local reservoir
on a perfect weather Saturday and tried it out for several hours,
not even going more than a couple of hundred feet from shore.
We just took turns paddling, getting the feel for a kayak, and
how the paddling worked, tried turns and maneuvering and simply
had a ball. She really enjoyed it. The boat was very stable,
tracked better than I'd expected, was very light to handle,
and quite surprised me. So that was that. We were going to take
up a new hobby.
I'd already been reading and studying on what to buy. The wife
liked the Perception Sport Swifty 9.5 foot in what they call
Gray/Blue (the same swirled blue/white "Cloud" pattern of the
Dimension we had). I had decided on a Future Beach Tropy 126
Angler for myself. One of my criteria, being a wildlife photographer,
was to have something I could more easily camoflage, so the
green appealed to me for that reason, not for it's good looks.
When I went to buy one locally I learned that Dick's Sporting
Goods was having their big boat sale coming up near the end
of May, so I decided to put off my purchase until then to save
some bucks, as I was planning to get the two kayaks, plus necessary
accessories. It gave me time to do more researching. I looked
at other retail stores, lots of online researching, and was
still pretty much resigned to the affordable Trophy 126. Then
I saw and sat in an Old Town Canoe Trip 10 Angler. It had a
more spacious cockpit, much better seat, easier to open/close
rear hatch, and a far more pleasant mottled camo green color
that appealed to me, though the price turned me off. Well, to
make a long story shorter, when I went to the Dick's sale I
got a far better deal on the Trip 10 Angler than I expected
(even better than advertised) and so I got it and a blue Swifty
for the wife.
A Mini-review of the Trip 10 Angler
If you're wondering about this "Trip 10 Angler" that the Old
Town Canoe manufacturer web site doesn't show, well, that makes
two of us. Even though Dick's Sporting Goods carried this model,
the manufacturer didn't list it at all. It is essentially the
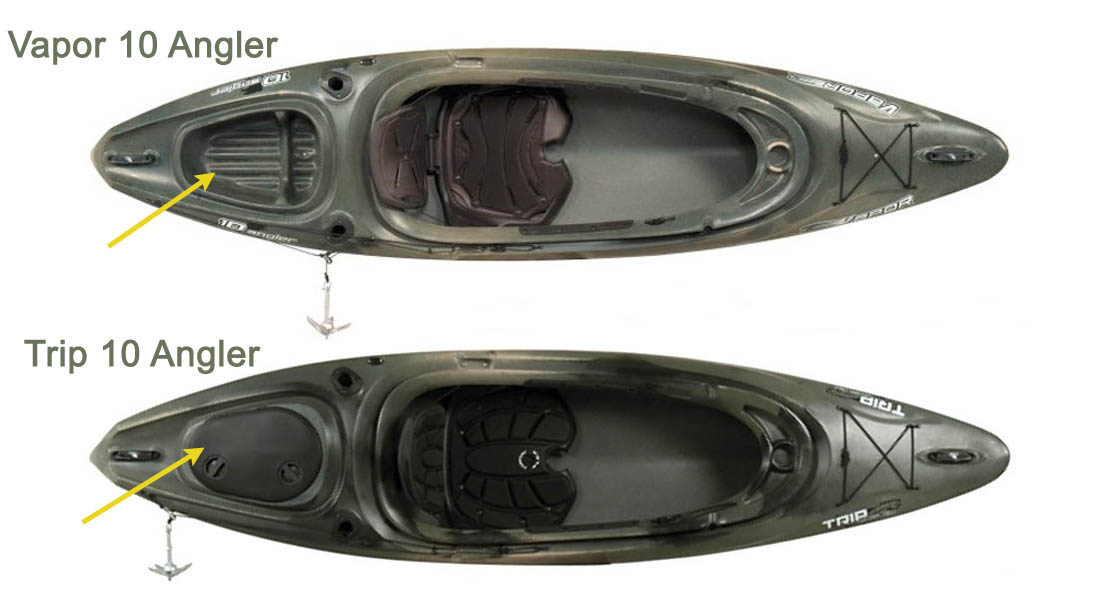
same thing as their Vapor 10 Angler, except for the day well.
The image below shows a comparison.
The Vapor 10 Angler has a molded "bowl" for the day well, while
the Trip 10 Angler has a conventional bulkhead with a full well
cavity and a locking, hinged well cover made of rigid plastic,
with a rubber ring seal for waterproofing. The cavity well provides
far more storage space than the open "bowl", plus it keeps stuff
as dry as any conventional covered cavity well. Other than the
irrelevant difference in the molded pattern on the seat pads,
the only practical, functional difference between the two kayak
models seems to be the day well design. So if you're familiar
with the Old Town Canoe Vapor 10 kayaks, this one should perform
the same as far as tracking, quality, weight, etc.
It has much more leg room than the Future Beach Angler 126.
The cockpit opening on that model was too small and cramped
for my 5'8" height (hardly what you'd call above average height).
Also, the foot room in the Future Beach was insufficient due
to the almost useless front day well that was only about 3 inches
deep, yet it hung down inside the kayak just far enough that
it was in the way of my size 10 feet. It proved to be a pretty
uncomfortable fit for even someone of my average size and build
(and the seat really sucked as well). Even the 9.5 foot Dimension
and Swifty were both more spacious in that area than the Future
Beach. The Trip 10 cockpit and foot room is quite spacious and
comfortable for me, and the larger cockpit opening even provides
enough space that a 54 liter dry bag holding camera equipment
fits between my knees where I can reach it easily. Although
the seat is much nicer than the Future Beach offered, I still
had to add considerable padding in the seat bottom to make my
skinny rear comfortable after only an hour of paddling. I suspect,
though, that many folks probably would find the seat quite suitable
as is.
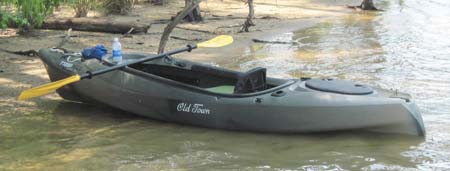
It has two recessed rod holders, but I don't fish with it (yet),
and I figured having these "tubes" to stick something in might
end up being useful for whatever other strange contraption my
busy mind will invent for them (maybe a canopy, or camo covered
cockpit "photography blind", or who knows). Anyway, they weren't
optional if I wanted the camo green colored hull for my photography.

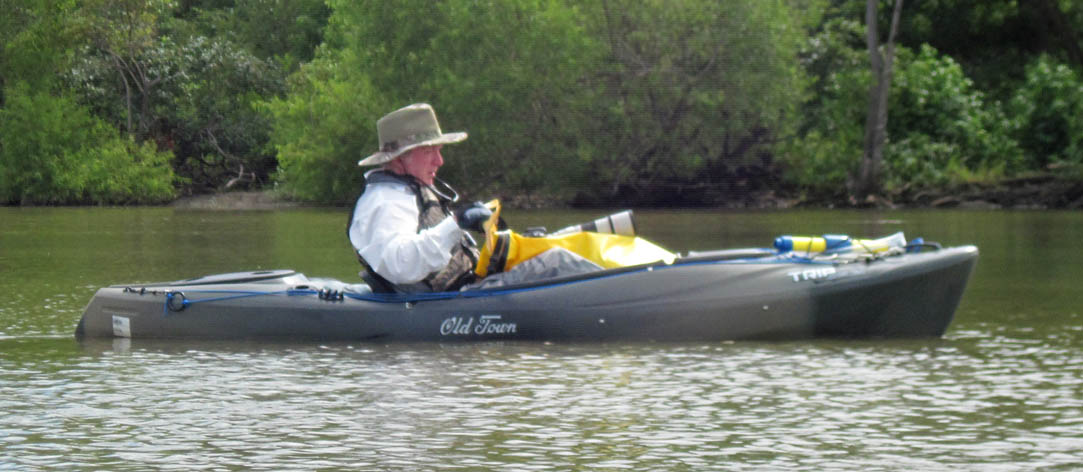
You can see here how the Trip
10 Angler's bow is considerably higher than the stern.
I find the boat tracks well, and is quite stable (as stable
as the other two 28-30 inch wide recreational models I have).
The bow of the hull is much deeper than the other two kayaks
we have (or the Future Beach I almost bought). I can easily
stuff a huge 54 liter dry bag up under the bow. Bow deck bungies
are provided, though there are none over the stern hatch. Bungies
across a hatch cover that already locks would only be in the
way as a rule, though I am trying to figure out a suitable pattern
to add bungies that criss-cross the rear hatch, with bungie
hooks to hold them out of the way when accessing the hatch.
The seat backrest is adjustable via a shock cord and clam cleat
with which to set the tension. There is even a fair amount of
space between the seatback and rear bulkhead for more storage.
Minimal knee pads are included too.
As I said, except for the day well, all these features of the
Trip 10 Angler appear to be the same as the Vapor 10 Angler.
It comes with a folding anchor and anchor trolley, though the
trolley only covers the aft end of the hull. The first thing
I did was to remove the original anchor trolley and install
my own that runs the full length of the hull. The existing uni-directional
clam cleat for the trolley line was useless, since it only grips
in one direction, and the trolley line goes in both directions.
I removed the anvil style cleat meant for tying the anchor line
and replaced it with a zig-zag cleat which I now use to tie
off the trolley line. I then replaced the clam cleat with the
anvil cleat, which I use for tying off the anchor line (as it
was meant to originally, just in a different location). Any
way I looked at it I'd end up with extra unused holes I don't
want. Maybe I'll plug them with a tiny dab of silicon, though
it really won't matter, as they are not in a bad location.
The cockpit has a molded-in tray with cup holder depression,
but I haven't found much use for it yet. Perhaps it's a good
spot for fishermen to mount fish finders or another rod holder.
The combing is notched for a cross-wise paddle holder with bungee
cord. While the notches are fine, the bungee cord loop hooked
forward of the shaft, and it was a bit too far for me to reach
easily while trying to put enough pressure to stretch the cord
forward to hook it. Had this been situated so the cord was pulled
toward you to hook it, it would have been much more logical
and functional. I soon took it upon myself to remedy that issue,
which was easy enough. I wanted to instead use paddle clips,
but finding a position that I could line up two paddle clips
on the curvy hull proved a problem. I eventually solved that
with a cylindrical paddle clip which requires only one to hold
the paddle. I found a workable location next to the zig-zag
cleat. It turned out this solved a routing issue with my anchor
trolly line that had been riding up on the curvy hull. The clip
now acts as a guide to keep the line down where it should be.
Next to the paddle notch on the left side is a bungee loop that
I guess is meant for holding small things (MP3 player, GPS,
or whatever) but it's not in a good place to put anything you
don't want wet from a dripping paddle. Sometimes I'll use it
to hold my paddling gloves so I won't loose them when I take
them off temporarily, or to hold a water bottle for awhile.
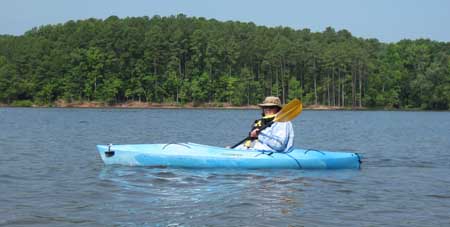
The Perception Sport Swifty
I suppose my only real complaint of the Trip 10 Angler is the
weight. While it's not overly heavy by itself, once I put a
little gear in there, it quickly tips the scale from "manageable"
to "difficult". This is not true of the Swifty. The weight of
the wife's Swifty seems a breeze next to my Trip 10. It seems
the Perception Sport Swifty is a great choice for the beginning
paddler. It's light, roomy, handles well, has lots of storage
in the bow and stern, and has a pretty good seat. There are
no bulkheads or wells, but not everybody needs those. The only
modification I've done to it is to add paddle clips. I didn't
care for the bungee/hook paddle holder that came with it, though
it certainly works fine, and frankly was in a more convenient
spot than the one on my Trip 10 Angler. For the price I don't
think you can do a lot better than the Swifty.
In subsequent entries I'll write on my solutions to hauling
my kayaks.
"If you're not paddling, you're not getting
anywhere."
|
|
|
|
| Article
Listing |
- Welcome
to "The Casual Kayaker"
- My
Rating System
- (B.
Everett) Jordan Lake - Farrington Point (northwest finger)
- June 18, 2011
- Paddling
in the Great Smoky Mountains, Jackson County, NC
- Bear
Creek Lake, Jackson County, NC, June 29, 2011
- Lake
Glenville, Jackson County, NC, June 30, 2011
- Wolf
Creek Lake, Jackson County,NC, July 1, 2011
- Kayaks,
Water, and DSLR Cameras - How I Manage Mine
- Our
first kayaks
- (B.
Everett) Jordan Lake, NC 751 area, July 16, 2011
- Hauling
My Kayaks - A Little Do-It-Yourself
- Waiting
out the weather
- Short
Paddle on the Coast for Wild Horses
- (B.Everett)
Jordan Lake, return to NC 751 area, November 19, 2011
- (B.
Everett) Jordan Lake - Farrington Point to Morgan Creek
- April 1, 2012
- (B.Everett)
Jordan Lake, White Oak Creek marsh, April 7, 2012
- (B.Everett)
Jordan Lake, Vista Point - north, April 14, 2012
|
INTRODUCTION
When
I first began kayaking I found a most helpful blog
by Tom Haynie that aided me greatly in finding and
choosing new flatwater locations. His blog was infinitely more
detailed and useful than anything I found on kayaking forums.
I quickly resolved to share my own impressions of locations
I've visited, including details I believe to be important and
helpful, in hopes of providing practical information to others.
I sincerely hope you find something useful and helpful here.
(For more location reports visit Tom's blog at backshortly.wordpress.com)
|
Kayaking
Links
Paddling.net
- More Locations
Paddling.net
- Launch Sites Map
Download
Google Earth (free)
My Other Web Sites-
CarolinaWildPhoto.com
CarolinaOuterBanks.com
NCWildHorses.com
GossamerTrilogy.com
|
|